
In the previous post, serverless event-driven application development is introduced. Also how to package R, necessary libraries/packages and a Lambda function handler is discussed. No need of provisioning/managing servers is one of the key benefits of the architecture. It is also a cost-effective way of delivering a data product as functions are executed on-demand rather than in servers that run 24/7. Furthermore AWS Lambda free tier includes 1M free requests per month and 400,000 GB-seconds of compute time per month, which is available to both existing and new AWS customers indefinitely. (GB-seconds is applicable when execution is made with 1 GB of memory.) Lowering the size of memory increases the execution time and thus 3.2M seconds or about 37 days are free with 128 MB of memory (1 GB divided by 8) - note that CPU power is proportional to allocated memory.
Initially I was planning to discuss how to deploy a package at AWS Lambda and to expose it via Amazon API Gateway in this post. However it’d be too long with so many screenshots and I split them in Part II and III. Here is an updated series plan.
- Backend
- Frontend
[EDIT 2017-04-17] The Lambda function handler (handler.py) has been modified to resolve an issue of Cross-Origin Resource Sharing (CORS). See Part IV for further details.
Managing security
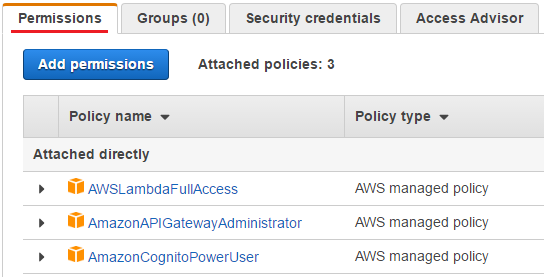
Before deploying a Lambda package, it is necessary to understand the security framework provided by AWS mostly based on AWS Identity and Access Management (IAM). To use AWS services (e.g. downloading a file from S3), AWS needs to identify the user or service (eg AWS Lambda) that makes the API call - this is the authentication. Also it needs to be checked whether the user or service has the permission - this is the authorization. For example, for this POC product development, I created a user and authentication is made by permanent credentials (Access Key ID and Secret Access Key) given to the user. Authorization is managed by policy and the following 3 AWS managed policies are attached to the user.
- AWSLambdaFullAccess
- AmazonAPIGatewayAdministrator
- AmazonCognitoPowerUser
These policies define permissions to relevant AWS services such as Amazon S3, Amazon CloudWatch, AWS Lambda and Amazon API Gateway - note that they are user-based policies. The attached policies can be found in the Users section of IAM.
Unlike users (and groups that can have one or more users with relevant permissions), AWS services (eg AWS Lambda) can assume a role, inheriting the permissions given to the role. Roles don’t have permanent credentials assigned to them but, when a service assumes a role, temporary credentials are assigned and they are used to authorize the service to do what’s defined in the (user-defined) policies attached to the role. Note that temporary credentials are made up of Access Key ID, Secret Access Key and Security Token and are generated by AWS Security Token Service (STS). In order to assume a role, a service needs another type of policy called trust policy, which defines who can assume a role. Therefore we need both types of policy so as to deploy the POC application at AWS Lambda.
- User-based policy - to give permissions to AWS services
- Trust policy - to assume a role
Note that this section is based on the Ch4 of AWS Lambda in Action and I find this book is quite a good material to learn AWS Lambda.
Creating role and policy
Before creating a role, it is necessary to create (user-based) policies so that the Lambda function can be given permissions to relevant AWS services. For the POC application, the function needs to download the model object (admission.rds) from S3 and to log messages to Amazon CloudWatch. For the former, a tailored policy (ServerlessPOC) is created while an AWS managed policy (AWSLambdaBasicExecutionRole) is used for the latter. In a policy, permissions are defined in statements and the main elements of statments are shown below.
- Effect - Allow or deny
- Action - What actions are in effect?
- Resource - On which resources?
- Principal - Who is allowed or denied access to a resource? (relevant to trust policies)
ServerlessPOC is read-only permission to all keys in the serverless-poc-models bucket while AWSLambdaBasicExecutionRole is write permission to all resources in Amazon CloudWatch.
 1//ServerlessPOC
 2{
 3    "Version": "2012-10-17",
 4    "Statement": [
 5        {
 6            "Effect": "Allow",
 7            "Action": [
 8                "s3:GetObject"
 9            ],
10            "Resource": [
11                "arn:aws:s3:::serverless-poc-models/*"
12            ]
13        }
14    ]
15}
16
17//AWSLambdaBasicExecutionRole
18{
19    "Version": "2012-10-17",
20    "Statement": [
21        {
22            "Effect": "Allow",
23            "Action": [
24                "logs:CreateLogGroup",
25                "logs:CreateLogStream",
26                "logs:PutLogEvents"
27            ],
28            "Resource": "*"
29        }
30    ]
31}
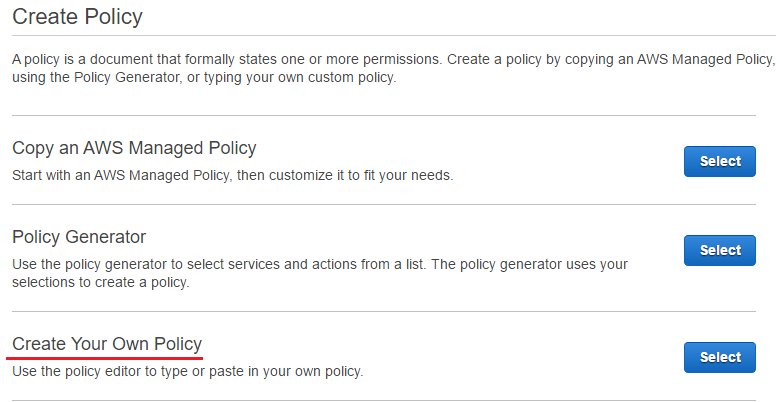
Only ServerlessPOC needs to be created and it is created in AWS Console. In the Policies section of IAM, the last option (Create Your Own Policy) is selected as it is quite a simple policy.
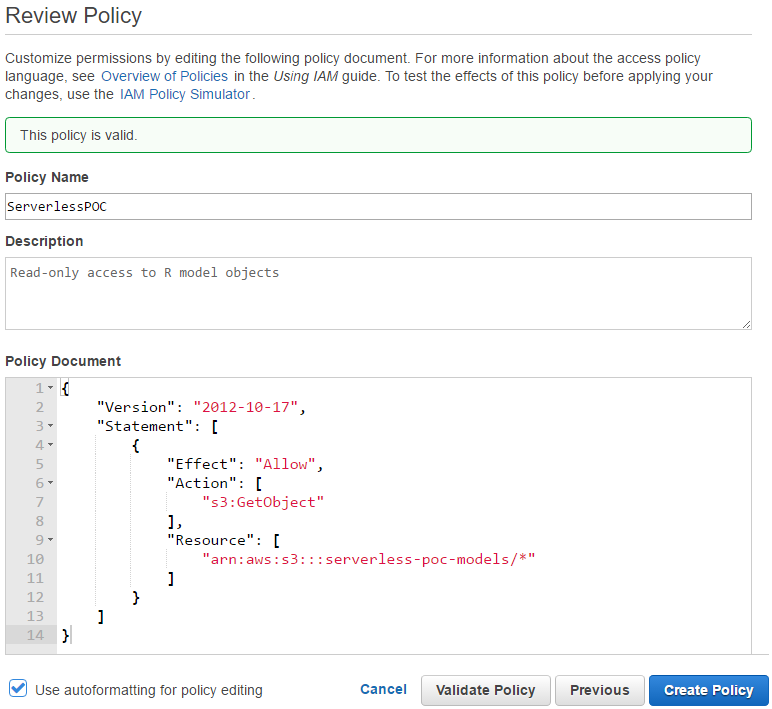
Then the name, description and policy document is completed - it is possible to validate the policy document by clicking the Validate Policy button.
Now it is ready to create a role for the Lambda function while attaching the policies described above. A role can be created in the Roles section of IAM.
- Step 1 : Set Role Name
- Step 2 : Select Role Type
- Step 3 : Establish Trust
- Step 4 : Attach Policy
- Step 5 : Review
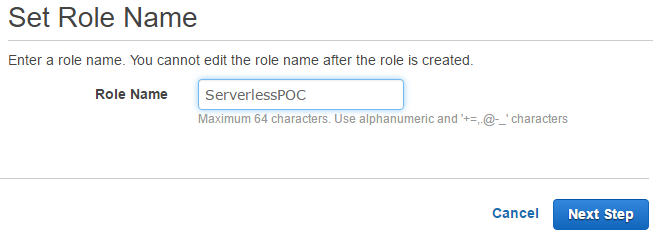
Step 1 : Set Role Name
This is simply setting the name of the role.
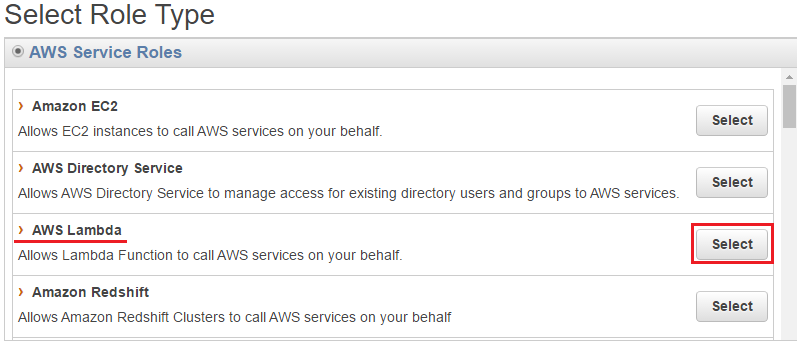
Step 2 : Select Role Type
AWS Lambda is selected in the AWS Service Roles group.
Step 3 : Establish Trust
This step passes automatically while the following trust policy is created, which allows to assume a role for AWS Lambda.
 1// Trust Relationship
 2{
 3  "Version": "2012-10-17",
 4  "Statement": [
 5    {
 6      "Effect": "Allow",
 7      "Principal": {
 8        "Service": "lambda.amazonaws.com"
 9      },
10      "Action": "sts:AssumeRole"
11    }
12  ]
13}
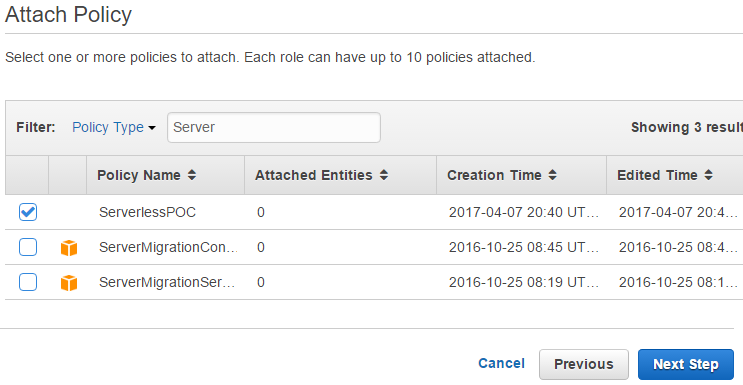
Step 4 : Attach Policy
Here ServerlessPOC and AWSLambdaBasicExecutionRole are attached to the role - it is possible to select multiple policies by checking tick boxes.
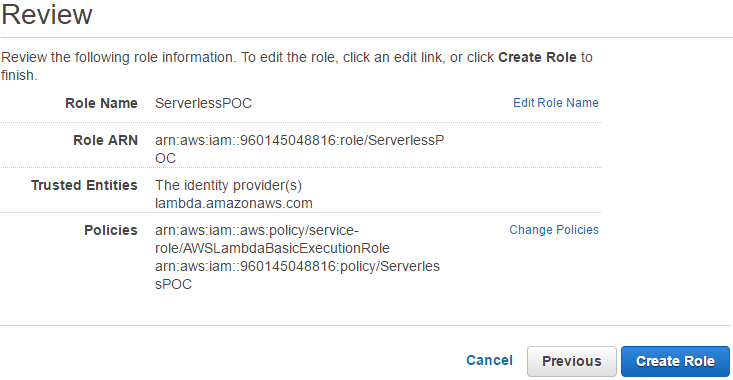
Step 5 : Review
After reviewing, it is possible to create the role.
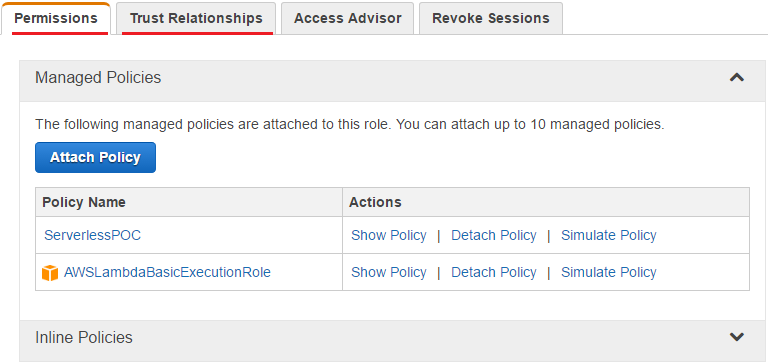
Now the role (ServerlessPOC) can be seen in the Roles section of IAM. The user-based and trust policies are found in the Permissions and Trust Relationships tabs respectively.
Deployment
- Select blueprint
- Configure triggers
- Configure function
- Review
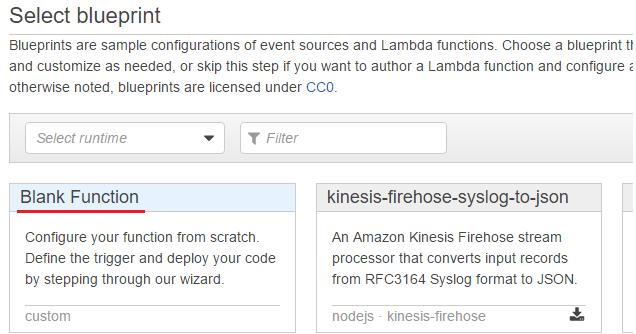
Select blueprint
Blueprints are sample configurations of event sources and Lambda functions. Blank Function is selected for the Lambda function of the POC application.
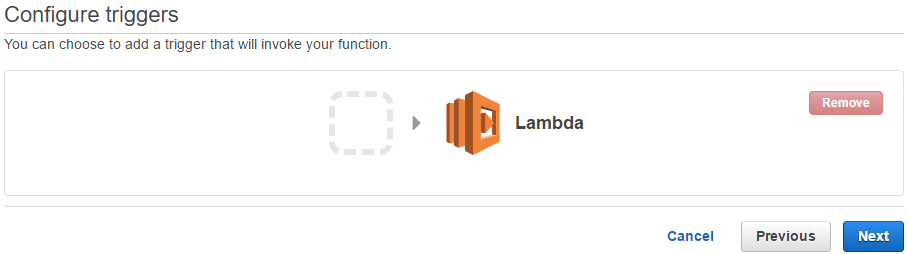
Configure triggers
A Lambda function can be triggered by another AWS service and clicking the dashed box populates available services. No trigger is selected for the Lambda function of the POC application. Note that triggering a Lambda function by changes in another service is useful because an application can be structured in an event-driven way and there is no need to control everything in a big program/script.
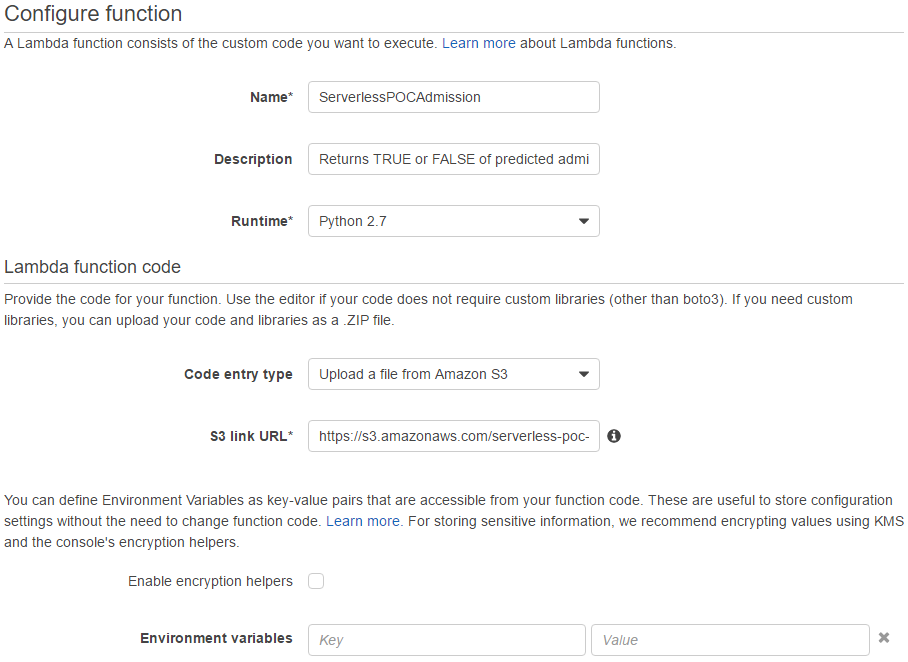
Configure function
Now it is time to configure the function. The function’s name (ServerlessPOCAdmission) and description are filled in followed by selecting the runtime - Python 2.7 is the only supported version of Python at the moment. Then code for the function needs to be provided and the following 3 options are avaialble.
- Edit code inline
- Upload a .ZIP file
- Upload a file from Amazon S3
As the deployment package (admission.zip) is copied to S3 already, the last option is selected and its S3 link URL is filled in.
The value of handler is set as handler.lambda_handler as the Lambda function handler is in handler.py and named as lambda_handler. Then the role named ServerlessPOC is chosen after selecting the value of role to be Choose an existing role among the options listed below.
- Choose an existing role
- Create new role from template(s)
- Create a custom role
For memory and timeout, 128 MB and 6 seconds are chosen respectively. Note that they can be modified and the timeout is set back to the default 3 seconds while testing.
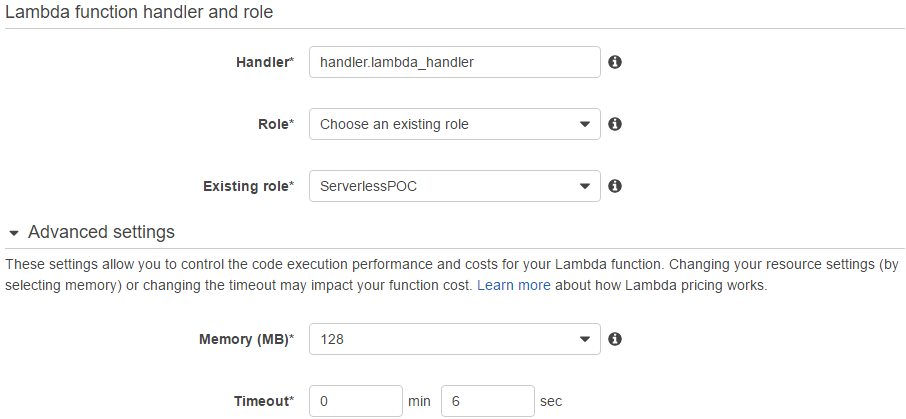
The remaining settings are left as they are.
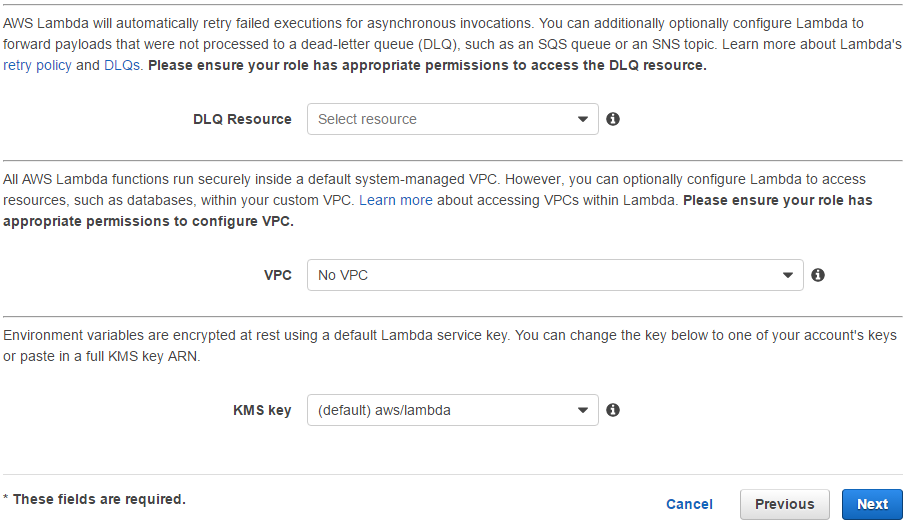
After clicking the Next button, it is possible to review and create the function.
Testing and invoke API
Testing
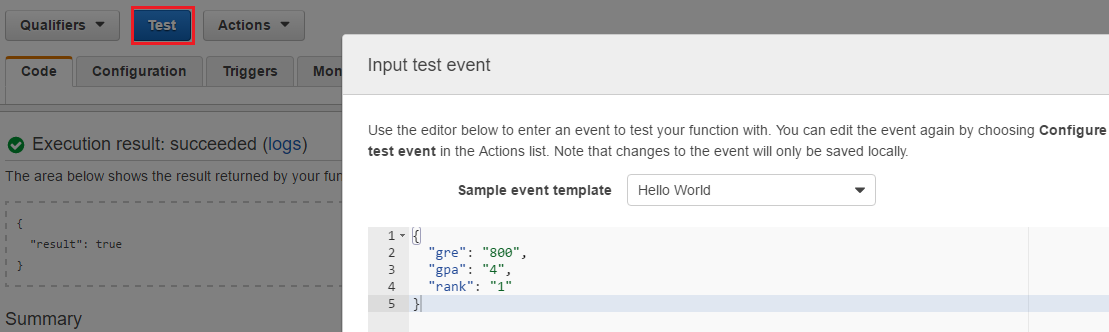
Testing a Lambda function can be done on the Console. When clicking the Test button, an editor pops up and it is possible to enter an event. For the Lambda function, gre, gpa and rank are set to be “800”, “4” and “1” respectively. Testing can be done by clicking the Save and Test button at the bottom - not shown in the screen shot.
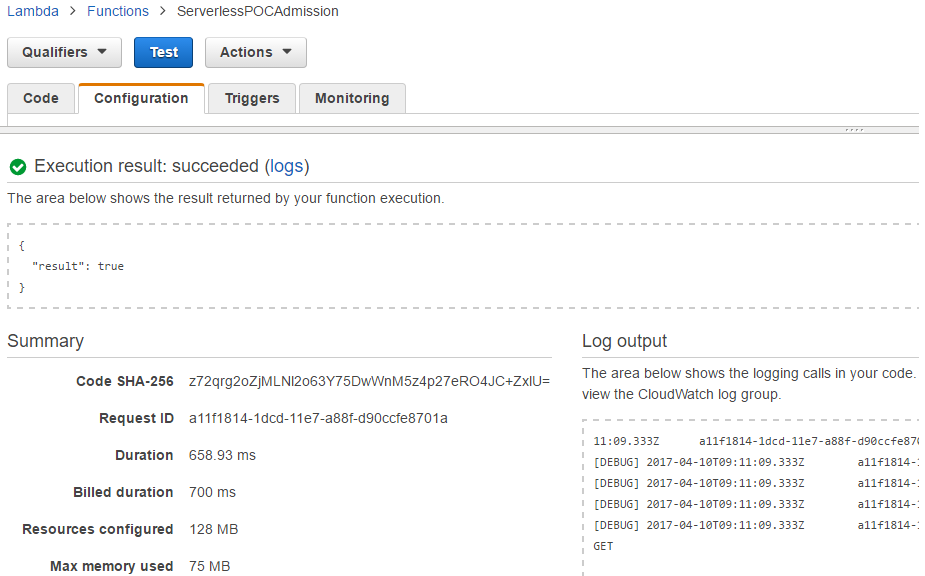
The testing output includes Execution result, Summary and Log output. With the event values specified earlier, it returns true. Note that the Python dictionary output of the hander function is coverted to JSON. Also an event specified as JSON is automatically converted to Python dictionary.
As shown in the summary, it took 658.93 ms to complete. If testing is made multiple times without delay, the duration decreases quite significantly to less than 200 ms thanks to container reuse in AWS Lambda - recall that the model object is not downloaded if it exists in /tmp. If latency is an issue, it is possible to call the function in every, let say, 5 minutes. As mentioned eariler, a Lambda function can be triggered by another AWS service and, if an Amazon CloudWatch event is set, the function call can be scheduled.
Invoke API
AWS Lambda provides the invoke API so that a Lambda function can be called programmatically as shown below.
1$ aws lambda invoke --function-name ServerlessPOCAdmission \
2    --payload '{"gre":"800", "gpa":"4", "rank":"1"}' output.txt
3{
4  "StatusCode": 200
5}
6
7$ cat output.txt | grep result
8{"result": true}
This is all for the part II. The POC application is successfully deployed at AWS Lambda and now it is ready to expose it via Amazon API Gateway. This will be discussed in the next post. I hope you enjoy reading this post.

Comments