When we develop a Spark application on EMR, we can use docker for local development or notebooks via EMR Studio (or EMR Notebooks). However, the local development option is not viable if the size of data is large. Also, I am not a fan of notebooks as it is not possible to utilise the features my editor supports such as syntax highlighting, autocomplete and code formatting. Moreover, it is not possible to organise code into modules and to perform unit testing properly with that option. In this post, We will discuss how to set up a remote development environment on an EMR cluster deployed in a private subnet with VPN and the VS Code remote SSH extension. Typical Spark development examples will be illustrated while sharing the cluster with multiple users. Overall it brings another effective way of developing Spark apps on EMR, which improves developer experience significantly.
Architecture
An EMR cluster is deployed in a private subnet and, by default, it is not possible to access it from the developer machine. We can construct a PC-to-PC VPN with SoftEther VPN to establish connection to the master node of the cluster. The VPN server runs in a public subnet, and it is managed by an autoscaling group where only a single instance is maintained. An elastic IP address is associated with the instance so that its public IP doesn’t change even if the EC2 instance is recreated. Access from the VPN server to the master node is allowed by an additional security group where the VPN’s security group is granted access to the master node. The infrastructure is built using Terraform and the source can be found in the post’s GitHub repository.
SoftEther VPN provides the server and client manager programs and they can be downloaded from the download centre page. We can create a VPN user using the server manager and the user can establish connection using the client manager. In this way a developer can access an EMR cluster deployed in a private subnet from the developer machine. Check one of my earlier posts titled Simplify Your Development on AWS with Terraform for a step-by-step illustration of creating a user and making a connection. The VS Code Remote - SSH extension is used to open a folder in the master node of an EMR cluster. In this way, developer experience can be improved significantly while making use of the full feature set of VS Code. The architecture of the remote development environment is shown below.

Infrastructure
The infrastructure of this post is an extension that I illustrated in the previous post. The resources covered there (VPC, subnets, auto scaling group for VPN etc.) won’t be repeated. The main resource in this post is an EMR cluster and the latest EMR 6.7.0 release is deployed with single master and core node instances. It is set up to use the AWS Glue Data Catalog as the metastore for Hive and Spark SQL by updating the corresponding configuration classification. Additionally, a managed scaling policy is created so that up to 5 instances are added to the core node. Note the additional security group of the master and slave by which the VPN server is granted access to the master and core node instances - the details of that security group is shown below.
 1# infra/emr.tf
 2resource "aws_emr_cluster" "emr_cluster" {
 3  name                              = "${local.name}-emr-cluster"
 4  release_label                     = local.emr.release_label # emr-6.7.0
 5  service_role                      = aws_iam_role.emr_service_role.arn
 6  autoscaling_role                  = aws_iam_role.emr_autoscaling_role.arn
 7  applications                      = local.emr.applications # ["Spark", "Livy", "JupyterEnterpriseGateway", "Hive"]
 8  ebs_root_volume_size              = local.emr.ebs_root_volume_size
 9  log_uri                           = "s3n://${aws_s3_bucket.default_bucket[0].id}/elasticmapreduce/"
10  step_concurrency_level            = 256
11  keep_job_flow_alive_when_no_steps = true
12  termination_protection            = false
13
14  ec2_attributes {
15    key_name                          = aws_key_pair.emr_key_pair.key_name
16    instance_profile                  = aws_iam_instance_profile.emr_ec2_instance_profile.arn
17    subnet_id                         = element(tolist(module.vpc.private_subnets), 0)
18    emr_managed_master_security_group = aws_security_group.emr_master.id
19    emr_managed_slave_security_group  = aws_security_group.emr_slave.id
20    service_access_security_group     = aws_security_group.emr_service_access.id
21    additional_master_security_groups = aws_security_group.emr_vpn_access.id # grant access to VPN server
22    additional_slave_security_groups  = aws_security_group.emr_vpn_access.id # grant access to VPN server
23  }
24
25  master_instance_group {
26    instance_type  = local.emr.instance_type # m5.xlarge
27    instance_count = local.emr.instance_count # 1
28  }
29  core_instance_group {
30    instance_type  = local.emr.instance_type # m5.xlarge
31    instance_count = local.emr.instance_count # 1
32  }
33
34  configurations_json = <<EOF
35    [
36      {
37          "Classification": "hive-site",
38          "Properties": {
39              "hive.metastore.client.factory.class": "com.amazonaws.glue.catalog.metastore.AWSGlueDataCatalogHiveClientFactory"
40          }
41      },
42      {
43          "Classification": "spark-hive-site",
44          "Properties": {
45              "hive.metastore.client.factory.class": "com.amazonaws.glue.catalog.metastore.AWSGlueDataCatalogHiveClientFactory"
46          }
47      }
48    ]
49  EOF
50
51  tags = local.tags
52
53  depends_on = [module.vpc]
54}
55
56resource "aws_emr_managed_scaling_policy" "emr_scaling_policy" {
57  cluster_id = aws_emr_cluster.emr_cluster.id
58
59  compute_limits {
60    unit_type              = "Instances"
61    minimum_capacity_units = 1
62    maximum_capacity_units = 5
63  }
64}
The following security group is created to enable access from the VPN server to the EMR instances. Note that the inbound rule is created only when the local.vpn.to_create variable value is true while the security group is created always - if the value is false, the security group has no inbound rule.
 1# infra/emr.tf
 2resource "aws_security_group" "emr_vpn_access" {
 3  name   = "${local.name}-emr-vpn-access"
 4  vpc_id = module.vpc.vpc_id
 5
 6  lifecycle {
 7    create_before_destroy = true
 8  }
 9
10  tags = local.tags
11}
12
13resource "aws_security_group_rule" "emr_vpn_inbound" {
14  count                    = local.vpn.to_create ? 1 : 0
15  type                     = "ingress"
16  description              = "VPN access"
17  security_group_id        = aws_security_group.emr_vpn_access.id
18  protocol                 = "tcp"
19  from_port                = 0
20  to_port                  = 65535
21  source_security_group_id = aws_security_group.vpn[0].id
22}
Change to Secret Generation
For configuring the VPN server, we need a IPsec pre-shared key and admin password. While those are specified as variables earlier, they are generated internally in this post for simplicity. The Terraform shell resource module generates and concatenates them with double dashes (–). The corresponding values are parsed into the user data of the VPN instance and the string is saved into a file to be used for configuring the VPN server manager.
 1## create VPN secrets - IPsec Pre-Shared Key and admin password for VPN
 2##  see https://cloud.google.com/network-connectivity/docs/vpn/how-to/generating-pre-shared-key
 3module "vpn_secrets" {
 4  source = "Invicton-Labs/shell-resource/external"
 5
 6  # generate <IPsec Pre-Shared Key>--<admin password> and parsed in vpn module
 7  command_unix = "echo $(openssl rand -base64 24)--$(openssl rand -base64 24)"
 8}
 9
10resource "local_file" "vpn_secrets" {
11  content  = module.vpn_secrets.stdout
12  filename = "${path.module}/secrets/vpn_secrets"
13}
14
15module "vpn" {
16  source  = "terraform-aws-modules/autoscaling/aws"
17  version = "~> 6.5"
18  count   = local.vpn.to_create ? 1 : 0
19
20  name = "${local.name}-vpn-asg"
21
22  key_name            = local.vpn.to_create ? aws_key_pair.key_pair[0].key_name : null
23  vpc_zone_identifier = module.vpc.public_subnets
24  min_size            = 1
25  max_size            = 1
26  desired_capacity    = 1
27
28  image_id                 = data.aws_ami.amazon_linux_2.id
29  instance_type            = element([for s in local.vpn.spot_override : s.instance_type], 0)
30  security_groups          = [aws_security_group.vpn[0].id]
31  iam_instance_profile_arn = aws_iam_instance_profile.vpn[0].arn
32
33  # Launch template
34  create_launch_template = true
35  update_default_version = true
36
37  user_data = base64encode(join("\n", [
38    "#cloud-config",
39    yamlencode({
40      # https://cloudinit.readthedocs.io/en/latest/topics/modules.html
41      write_files : [
42        {
43          path : "/opt/vpn/bootstrap.sh",
44          content : templatefile("${path.module}/scripts/bootstrap.sh", {
45            aws_region     = local.region,
46            allocation_id  = aws_eip.vpn[0].allocation_id,
47            vpn_psk        = split("--", replace(module.vpn_secrets.stdout, "\n", ""))[0], # specify IPsec pre-shared key
48            admin_password = split("--", replace(module.vpn_secrets.stdout, "\n", ""))[1]  # specify admin password
49          }),
50          permissions : "0755",
51        }
52      ],
53      runcmd : [
54        ["/opt/vpn/bootstrap.sh"],
55      ],
56    })
57  ]))
58
59  ...
60
61  tags = local.tags
62}
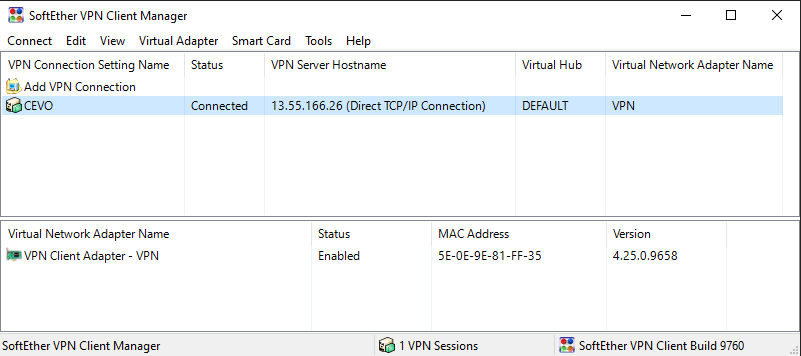
After deploying all the resources, it is good to go to the next section if we’re able to connect to the VPN server as shown below.
Preparation
User Creation
While we are able to use the default hadoop user for development, we can add additional users to share the cluster as well. First let’s access the master node via ssh as shown below. Note the access key is stored in the infra/key-pair folder and the master private DNS name can be obtained from the _emr_cluster_master_dns _output value.
 1# access to the master node via ssh
 2jaehyeon@cevo$ export EMR_MASTER_DNS=$(terraform -chdir=./infra output --raw emr_cluster_master_dns)
 3jaehyeon@cevo$ ssh -i infra/key-pair/emr-remote-dev-emr-key.pem hadoop@$EMR_MASTER_DNS
 4The authenticity of host 'ip-10-0-113-113.ap-southeast-2.compute.internal (10.0.113.113)' can't be established.
 5ECDSA key fingerprint is SHA256:mNdgPWnDkCG/6IsUDdHAETe/InciOatb8jwELnwfWR4.
 6Are you sure you want to continue connecting (yes/no/[fingerprint])? yes
 7Warning: Permanently added 'ip-10-0-113-113.ap-southeast-2.compute.internal,10.0.113.113' (ECDSA) to the list of known hosts.
 8
 9       __|  __|_  )
10       _|  (     /   Amazon Linux 2 AMI
11      ___|\___|___|
12
13https://aws.amazon.com/amazon-linux-2/
1417 package(s) needed for security, out of 38 available
15Run "sudo yum update" to apply all updates.
16
17EEEEEEEEEEEEEEEEEEEE MMMMMMMM           MMMMMMMM RRRRRRRRRRRRRRR
18E::::::::::::::::::E M:::::::M         M:::::::M R::::::::::::::R
19EE:::::EEEEEEEEE:::E M::::::::M       M::::::::M R:::::RRRRRR:::::R
20  E::::E       EEEEE M:::::::::M     M:::::::::M RR::::R      R::::R
21  E::::E             M::::::M:::M   M:::M::::::M   R:::R      R::::R
22  E:::::EEEEEEEEEE   M:::::M M:::M M:::M M:::::M   R:::RRRRRR:::::R
23  E::::::::::::::E   M:::::M  M:::M:::M  M:::::M   R:::::::::::RR
24  E:::::EEEEEEEEEE   M:::::M   M:::::M   M:::::M   R:::RRRRRR::::R
25  E::::E             M:::::M    M:::M    M:::::M   R:::R      R::::R
26  E::::E       EEEEE M:::::M     MMM     M:::::M   R:::R      R::::R
27EE:::::EEEEEEEE::::E M:::::M             M:::::M   R:::R      R::::R
28E::::::::::::::::::E M:::::M             M:::::M RR::::R      R::::R
29EEEEEEEEEEEEEEEEEEEE MMMMMMM             MMMMMMM RRRRRR      RRRRRR
30
31[hadoop@ip-10-0-113-113 ~]$
A user can be created as shown below. Optionally the user is added to the sudoers file so that the user is allowed to run a command as the root user without specifying the password. Note this is a shortcut only, and please check this page for proper usage of editing the sudoers file.
1# create a user and add to sudoers
2[hadoop@ip-10-0-113-113 ~]$ sudo adduser jaehyeon
3[hadoop@ip-10-0-113-113 ~]$ ls /home/
4ec2-user  emr-notebook  hadoop  jaehyeon
5[hadoop@ip-10-0-113-113 ~]$ sudo su
6[root@ip-10-0-113-113 hadoop]# chmod +w /etc/sudoers
7[root@ip-10-0-113-113 hadoop]# echo "jaehyeon  ALL=(ALL) NOPASSWD:ALL" >> /etc/sudoers
Also, as described in the EMR documentation, we must add the HDFS user directory for the user account and grant ownership of the directory so that the user is allowed to log in to the cluster to run Hadoop jobs.
 1[root@ip-10-0-113-113 hadoop]# sudo su - hdfs
 2# create user directory
 3-bash-4.2$ hdfs dfs -mkdir /user/jaehyeon
 4SLF4J: Class path contains multiple SLF4J bindings.
 5SLF4J: Found binding in [jar:file:/usr/lib/hadoop/lib/slf4j-log4j12-1.7.25.jar!/org/slf4j/impl/StaticLoggerBinder.class]
 6SLF4J: Found binding in [jar:file:/usr/lib/tez/lib/slf4j-reload4j-1.7.36.jar!/org/slf4j/impl/StaticLoggerBinder.class]
 7SLF4J: See http://www.slf4j.org/codes.html#multiple_bindings for an explanation.
 8SLF4J: Actual binding is of type [org.slf4j.impl.Log4jLoggerFactory]
 9# update directory ownership
10-bash-4.2$ hdfs dfs -chown jaehyeon:jaehyeon /user/jaehyeon
11SLF4J: Class path contains multiple SLF4J bindings.
12SLF4J: Found binding in [jar:file:/usr/lib/hadoop/lib/slf4j-log4j12-1.7.25.jar!/org/slf4j/impl/StaticLoggerBinder.class]
13SLF4J: Found binding in [jar:file:/usr/lib/tez/lib/slf4j-reload4j-1.7.36.jar!/org/slf4j/impl/StaticLoggerBinder.class]
14SLF4J: See http://www.slf4j.org/codes.html#multiple_bindings for an explanation.
15SLF4J: Actual binding is of type [org.slf4j.impl.Log4jLoggerFactory]
16# check directories in /user
17-bash-4.2$ hdfs dfs -ls /user
18SLF4J: Class path contains multiple SLF4J bindings.
19SLF4J: Found binding in [jar:file:/usr/lib/hadoop/lib/slf4j-log4j12-1.7.25.jar!/org/slf4j/impl/StaticLoggerBinder.class]
20SLF4J: Found binding in [jar:file:/usr/lib/tez/lib/slf4j-reload4j-1.7.36.jar!/org/slf4j/impl/StaticLoggerBinder.class]
21SLF4J: See http://www.slf4j.org/codes.html#multiple_bindings for an explanation.
22SLF4J: Actual binding is of type [org.slf4j.impl.Log4jLoggerFactory]
23Found 7 items
24drwxrwxrwx   - hadoop   hdfsadmingroup          0 2022-09-03 10:19 /user/hadoop
25drwxr-xr-x   - mapred   mapred                  0 2022-09-03 10:19 /user/history
26drwxrwxrwx   - hdfs     hdfsadmingroup          0 2022-09-03 10:19 /user/hive
27drwxr-xr-x   - jaehyeon jaehyeon                0 2022-09-03 10:39 /user/jaehyeon
28drwxrwxrwx   - livy     livy                    0 2022-09-03 10:19 /user/livy
29drwxrwxrwx   - root     hdfsadmingroup          0 2022-09-03 10:19 /user/root
30drwxrwxrwx   - spark    spark                   0 2022-09-03 10:19 /user/spark
Finally, we need to add the public key to the .ssh/authorized_keys file in order to set up public key authentication for SSH access.
1# add public key
2[hadoop@ip-10-0-113-113 ~]$ sudo su - jaehyeon
3[jaehyeon@ip-10-0-113-113 ~]$ mkdir .ssh
4[jaehyeon@ip-10-0-113-113 ~]$ chmod 700 .ssh
5[jaehyeon@ip-10-0-113-113 ~]$ touch .ssh/authorized_keys
6[jaehyeon@ip-10-0-113-113 ~]$ chmod 600 .ssh/authorized_keys
7[jaehyeon@ip-10-0-113-113 ~]$ PUBLIC_KEY="<SSH-PUBLIC-KEY>"
8[jaehyeon@ip-10-0-113-113 ~]$ echo $PUBLIC_KEY > .ssh/authorized_keys
Clone Repository
As we can open a folder in the master node, the GitHub repository is cloned to each user’s home folder to open later.
1[hadoop@ip-10-0-113-113 ~]$ sudo yum install git
2[hadoop@ip-10-0-113-113 ~]$ git clone https://github.com/jaehyeon-kim/emr-remote-dev.git
3[hadoop@ip-10-0-113-113 ~]$ ls
4emr-remote-dev
5[hadoop@ip-10-0-113-113 ~]$ sudo su - jaehyeon
6[jaehyeon@ip-10-0-113-113 ~]$ git clone https://github.com/jaehyeon-kim/emr-remote-dev.git
7[jaehyeon@ip-10-0-113-113 ~]$ ls
8emr-remote-dev
Access to EMR Cluster
Now we have two users that have access to the EMR cluster and their connection details are saved into an SSH configuration file as shown below.
 1Host emr-hadoop
 2  HostName ip-10-0-113-113.ap-southeast-2.compute.internal
 3  User hadoop
 4  ForwardAgent yes
 5  IdentityFile C:\Users\<username>\.ssh\emr-remote-dev-emr-key.pem
 6Host emr-jaehyeon
 7  HostName ip-10-0-113-113.ap-southeast-2.compute.internal
 8  User jaehyeon
 9  ForwardAgent yes
10  IdentityFile C:\Users\<username>\.ssh\id_rsa
Then we can see the connection details in the remote explorer menu of VS Code. Note the remote SSH extension should be installed for it. On right-clicking the mouse on the emr-hadoop connection, we can select the option to connect to the host in a new window.

In a new window, a menu pops up to select the platform of the remote host.

If it’s the first time connecting to the server, it requests to confirm whether you trust and want to continue connecting to the host. We can hit Continue.

Once we are connected, we can open a folder in the server. On selecting File > Open Folder… menu, we can see a list of folders that we can open. Let’s open the repository folder we cloned earlier.

VS Code asks whether we trust the authors of the files in this folder and we can hit Yes.
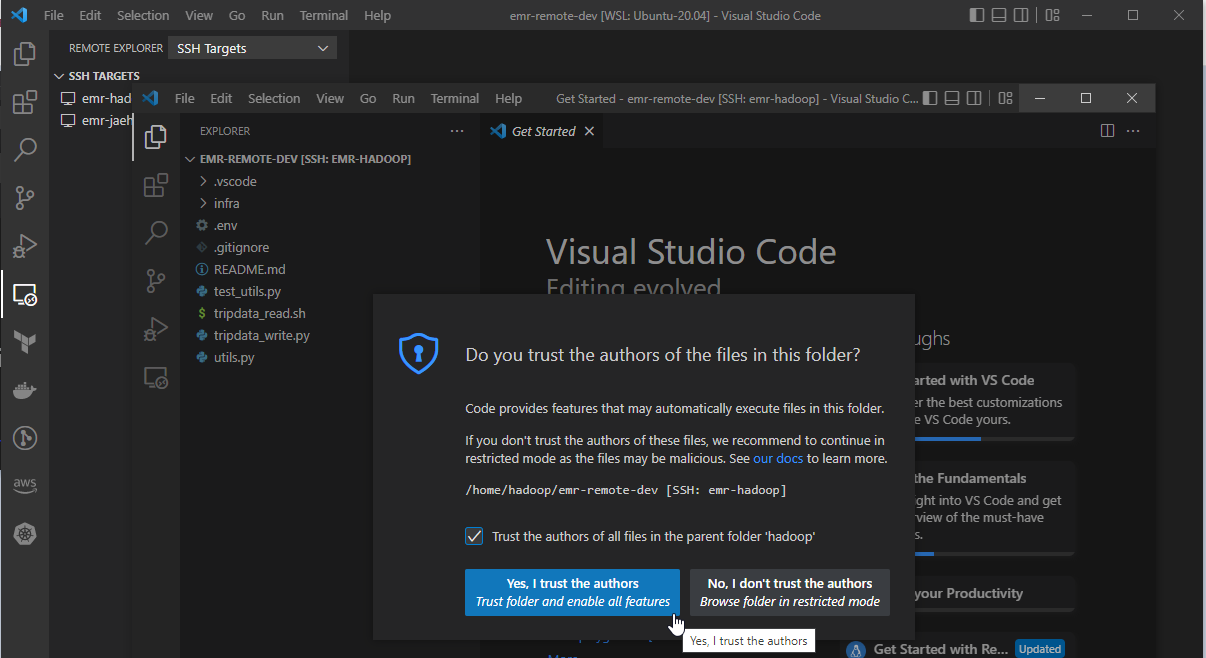
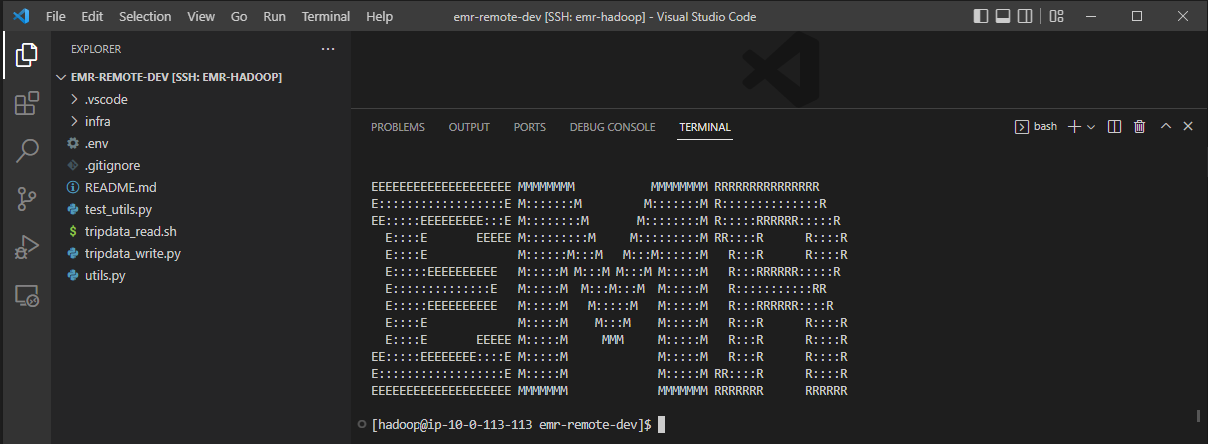
Now access to the server with the remote SSH extension is complete and we can check it by opening a terminal where it shows the typical EMR shell.
Python Configuration
We can install the Python extension at minimum and it indicates the extension will be installed in the remote server (emr-hadoop).

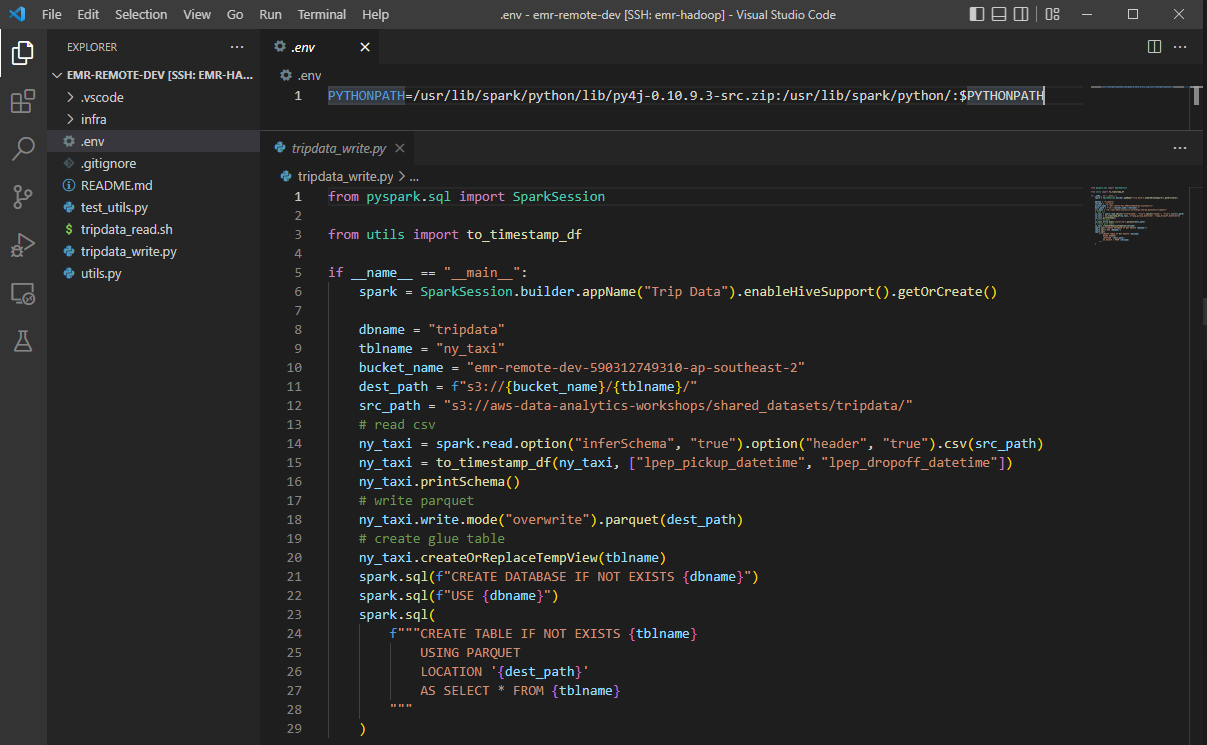
We’ll use the Pyspark and py4j packages that are included in the existing spark distribution. It can be done simply by creating an .env file that adds the relevant paths to the PYTHONPATH variable. In the following screenshot, you see that there is no warning to import SparkSession.
Remote Development
Transform Data
It is a simple Spark application that reads a sample NY taxi trip dataset from a public S3 bucket. Once loaded, it converts the pick-up and drop-off datetime columns from string to timestamp followed by writing the transformed data to a destination S3 bucket. It finishes by creating a Glue table with the transformed data.
 1# tripdata_write.py
 2from pyspark.sql import SparkSession
 3
 4from utils import to_timestamp_df
 5
 6if __name__ == "__main__":
 7    spark = SparkSession.builder.appName("Trip Data").enableHiveSupport().getOrCreate()
 8
 9    dbname = "tripdata"
10    tblname = "ny_taxi"
11    bucket_name = "emr-remote-dev-590312749310-ap-southeast-2"
12    dest_path = f"s3://{bucket_name}/{tblname}/"
13    src_path = "s3://aws-data-analytics-workshops/shared_datasets/tripdata/"
14    # read csv
15    ny_taxi = spark.read.option("inferSchema", "true").option("header", "true").csv(src_path)
16    ny_taxi = to_timestamp_df(ny_taxi, ["lpep_pickup_datetime", "lpep_dropoff_datetime"])
17    ny_taxi.printSchema()
18    # write parquet
19    ny_taxi.write.mode("overwrite").parquet(dest_path)
20    # create glue table
21    ny_taxi.createOrReplaceTempView(tblname)
22    spark.sql(f"CREATE DATABASE IF NOT EXISTS {dbname}")
23    spark.sql(f"USE {dbname}")
24    spark.sql(
25        f"""CREATE TABLE IF NOT EXISTS {tblname}
26            USING PARQUET
27            LOCATION '{dest_path}'
28            AS SELECT * FROM {tblname}
29        """
30    )
As the spark application should run in a cluster, we need to copy it into HDFS. For simplicity, I copied the current folder into the /user/hadoop/emr-remote-dev directory.
 1# copy current folder into /user/hadoop/emr-remote-dev
 2[hadoop@ip-10-0-113-113 emr-remote-dev]$ hdfs dfs -put . /user/hadoop/emr-remote-dev
 3SLF4J: Class path contains multiple SLF4J bindings.
 4SLF4J: Found binding in [jar:file:/usr/lib/hadoop/lib/slf4j-log4j12-1.7.25.jar!/org/slf4j/impl/StaticLoggerBinder.class]
 5SLF4J: Found binding in [jar:file:/usr/lib/tez/lib/slf4j-reload4j-1.7.36.jar!/org/slf4j/impl/StaticLoggerBinder.class]
 6SLF4J: See http://www.slf4j.org/codes.html#multiple_bindings for an explanation.
 7SLF4J: Actual binding is of type [org.slf4j.impl.Log4jLoggerFactory]
 8# check contents in /user/hadoop/emr-remote-dev
 9[hadoop@ip-10-0-113-113 emr-remote-dev]$ hdfs dfs -ls /user/hadoop/emr-remote-dev
10SLF4J: Class path contains multiple SLF4J bindings.
11SLF4J: Found binding in [jar:file:/usr/lib/hadoop/lib/slf4j-log4j12-1.7.25.jar!/org/slf4j/impl/StaticLoggerBinder.class]
12SLF4J: Found binding in [jar:file:/usr/lib/tez/lib/slf4j-reload4j-1.7.36.jar!/org/slf4j/impl/StaticLoggerBinder.class]
13SLF4J: See http://www.slf4j.org/codes.html#multiple_bindings for an explanation.
14SLF4J: Actual binding is of type [org.slf4j.impl.Log4jLoggerFactory]
15Found 10 items
16-rw-r--r--   1 hadoop hdfsadmingroup         93 2022-09-03 11:11 /user/hadoop/emr-remote-dev/.env
17drwxr-xr-x   - hadoop hdfsadmingroup          0 2022-09-03 11:11 /user/hadoop/emr-remote-dev/.git
18-rw-r--r--   1 hadoop hdfsadmingroup        741 2022-09-03 11:11 /user/hadoop/emr-remote-dev/.gitignore
19drwxr-xr-x   - hadoop hdfsadmingroup          0 2022-09-03 11:11 /user/hadoop/emr-remote-dev/.vscode
20-rw-r--r--   1 hadoop hdfsadmingroup         25 2022-09-03 11:11 /user/hadoop/emr-remote-dev/README.md
21drwxr-xr-x   - hadoop hdfsadmingroup          0 2022-09-03 11:11 /user/hadoop/emr-remote-dev/infra
22-rw-r--r--   1 hadoop hdfsadmingroup        873 2022-09-03 11:11 /user/hadoop/emr-remote-dev/test_utils.py
23-rw-r--r--   1 hadoop hdfsadmingroup        421 2022-09-03 11:11 /user/hadoop/emr-remote-dev/tripdata_read.sh
24-rw-r--r--   1 hadoop hdfsadmingroup       1066 2022-09-03 11:11 /user/hadoop/emr-remote-dev/tripdata_write.py
25-rw-r--r--   1 hadoop hdfsadmingroup        441 2022-09-03 11:11 /user/hadoop/emr-remote-dev/utils.py
The app can be submitted by specifying the HDFS locations of the app and source file. It is deployed to the YARN cluster with the client deployment mode. In this way, data processing can be performed by executors in the core node and we are able to check execution details in the same terminal.
1[hadoop@ip-10-0-113-113 emr-remote-dev]$ spark-submit \
2  --master yarn \
3  --deploy-mode client \
4  --py-files hdfs:/user/hadoop/emr-remote-dev/utils.py \
5  hdfs:/user/hadoop/emr-remote-dev/tripdata_write.py
Once the app completes, we can see that a Glue database named tripdata is created, and it includes a table named ny_taxi.
Read Data
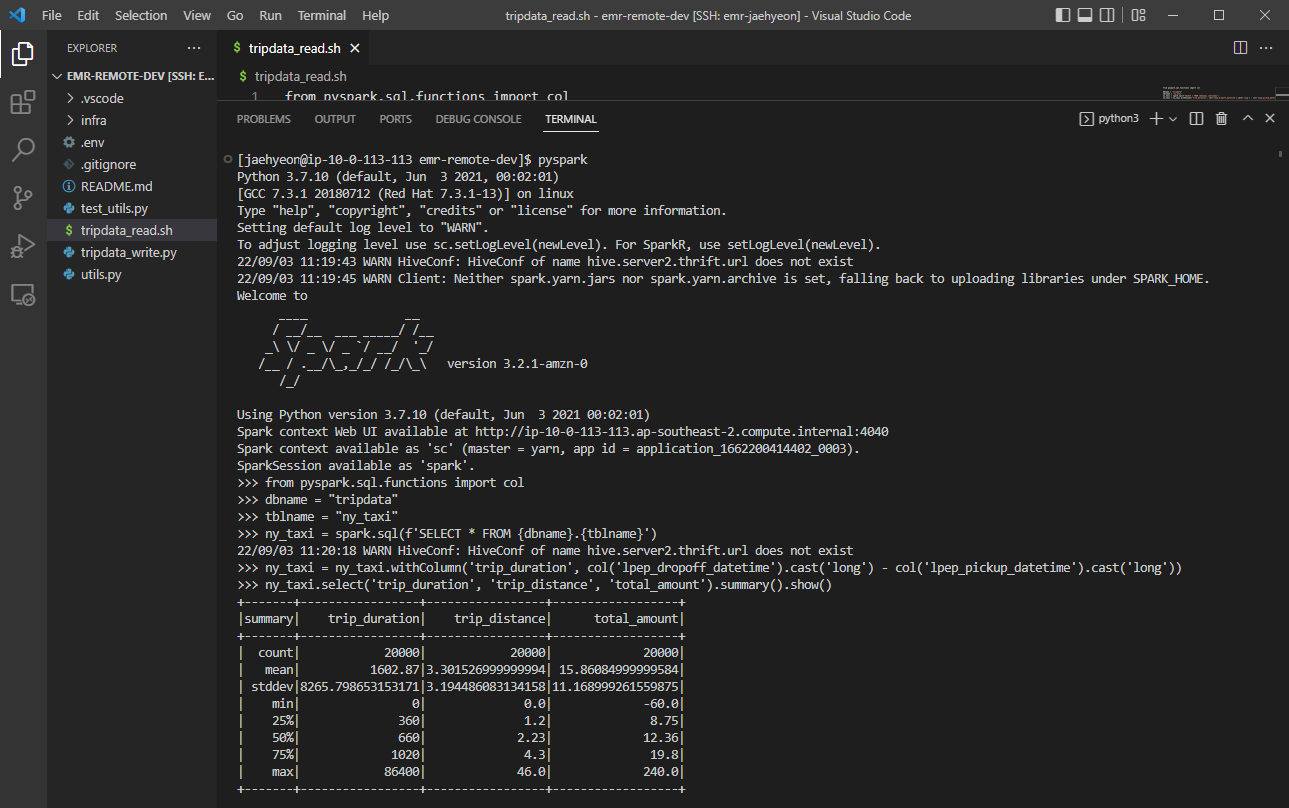
We can connect to the cluster with the other user account as well. Below shows an example of the PySpark shell that reads data from the table created earlier. It just reads the Glue table and adds a column of trip duration followed by showing the summary statistics of key columns.
Unit Test
The Spark application uses a custom function that converts the data type of one or more columns from string to timestamp - to_timestamp_df(). The source of the function and the testing script can be found below.
 1# utils.py
 2from typing import List, Union
 3from pyspark.sql import DataFrame
 4from pyspark.sql.functions import col, to_timestamp
 5
 6def to_timestamp_df(
 7    df: DataFrame, fields: Union[List[str], str], format: str = "M/d/yy H:mm"
 8) -> DataFrame:
 9    fields = [fields] if isinstance(fields, str) else fields
10    for field in fields:
11        df = df.withColumn(field, to_timestamp(col(field), format))
12    return df
13
14# test_utils.py
15import pytest
16import datetime
17from pyspark.sql import SparkSession
18from py4j.protocol import Py4JError
19
20from utils import to_timestamp_df
21
22
23@pytest.fixture(scope="session")
24def spark():
25    return (
26        SparkSession.builder.master("local")
27        .appName("test")
28        .config("spark.submit.deployMode", "client")
29        .getOrCreate()
30    )
31
32
33def test_to_timestamp_success(spark):
34    raw_df = spark.createDataFrame(
35        [("1/1/17 0:01",)],
36        ["date"],
37    )
38
39    test_df = to_timestamp_df(raw_df, "date", "M/d/yy H:mm")
40    for row in test_df.collect():
41        assert row["date"] == datetime.datetime(2017, 1, 1, 0, 1)
42
43
44def test_to_timestamp_bad_format(spark):
45    raw_df = spark.createDataFrame(
46        [("1/1/17 0:01",)],
47        ["date"],
48    )
49
50    with pytest.raises(Py4JError):
51        to_timestamp_df(raw_df, "date", "M/d/yy HH:mm").collect()
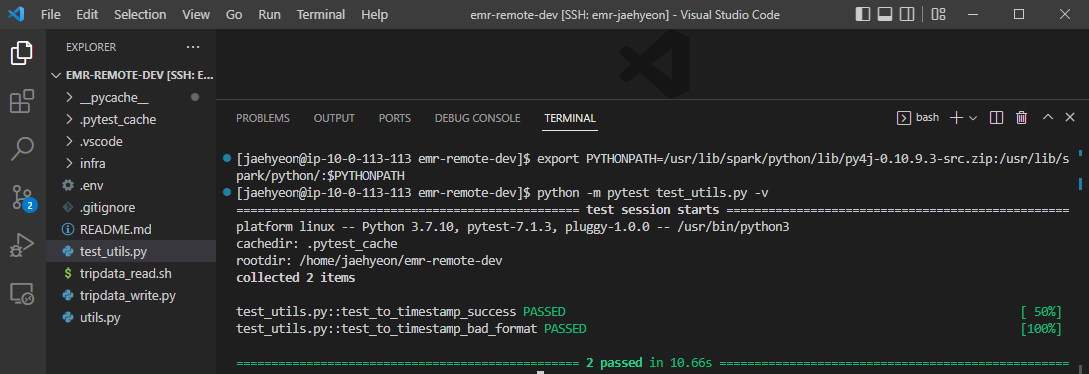
For unit testing, we need to install the Pytest package and export the PYTHONPATH variable that can be found in the .env file. Note, as testing can be run with a local Spark session, the testing package can only be installed in the master node. Below shows an example test run output.
Summary
In this post, we discussed how to set up a remote development environment on an EMR cluster. A cluster is deployed in a private subnet, access from a developer machine is established via PC-to-PC VPN and the VS Code Remote - SSH extension is used to perform remote development. Aside from the default hadoop user, an additional user account is created to show how to share the cluster with multiple users and spark development examples are illustrated with those user accounts. Overall the remote development brings another effective option to develop spark applications on EMR, which improves developer experience significantly.


Comments