
I started blogging in 2014. At first, it was based on a simple Jekyll theme that supports posting Markdown files, which are converted from R Markdown files. Most of my work was in R at that time and the simple theme was good enough, and it was hosted via GitHub Pages. It was around 2018 when I changed my blog with a single page application, built by Vue.js and hosted on AWS. It was fun as I was teaching myself web development while building an analytics portal at work. In 2020, I paused blogging for some time while expecting a baby and restarted publishing posts to my company’s blog page from mid-2021. It is good as I can have peer-reviews and the company provides an incentive for each post published. However, it is not the right place to publish all the posts that I plan. For example, I am recommended to keep in mind e.g. how an article translates into better customer outcomes. That’s understandable but not all posts can fit into it. Currently, I am teaching myself modern data streaming architectures, and some articles could be inadequate for customers until I gain competency. Therefore, I thought I need another place that I can publish posts without worrying about undermining my company’s reputation. I’d keep publishing to the company site, and I probably repost some of them to this new blog with delay.
I wouldn’t like to use the existing site as it misses some features, and it’d take time to add those to it. As I prefer a self-managed blog over a blog platform, I thought a static site generator and GitHub Pages would be one of the quickest options. After searching mainly Hugo, Jekyll and Pelican, Hugo caught up my eyes as it has more themes with good features. Among those I chose the Hugo Bootstrap Theme. In this post, I’ll demonstrate how I set up this blog site.
Quick Start
I used the starter template of the Hugo Bootstrap Theme. After installing Node.js (16+), I cloned the template and installed NPN packages by executing npm install. Then I changed the module name in the go.mod file into mine (i.e. module github.com/jaehyeon-kim/jaehyeon-kim.github.io). Finally, I started the site using docker-compose with the compose file shown below. Without docker, I have to install Hugo (0.97.0+) but the apt repo has an older version and I wouldn’t like to be bothered to install a supported version from source. Using docker-compose is a much easier way for me. Note it reloads the site when there is a change in the current directory so that updated contents can be checked on a browser seamlessly.
 1version: "3.5"
 2
 3services:
 4  hugo:
 5      image: klakegg/hugo:0.107.0-ext-ubuntu
 6      command: server -D -F -E --poll 700ms
 7      container_name: hugo
 8      volumes:
 9        - $PWD:/src
10        - /etc/ssl/certs:/etc/ssl/certs
11      ports:
12        - "1313:1313"
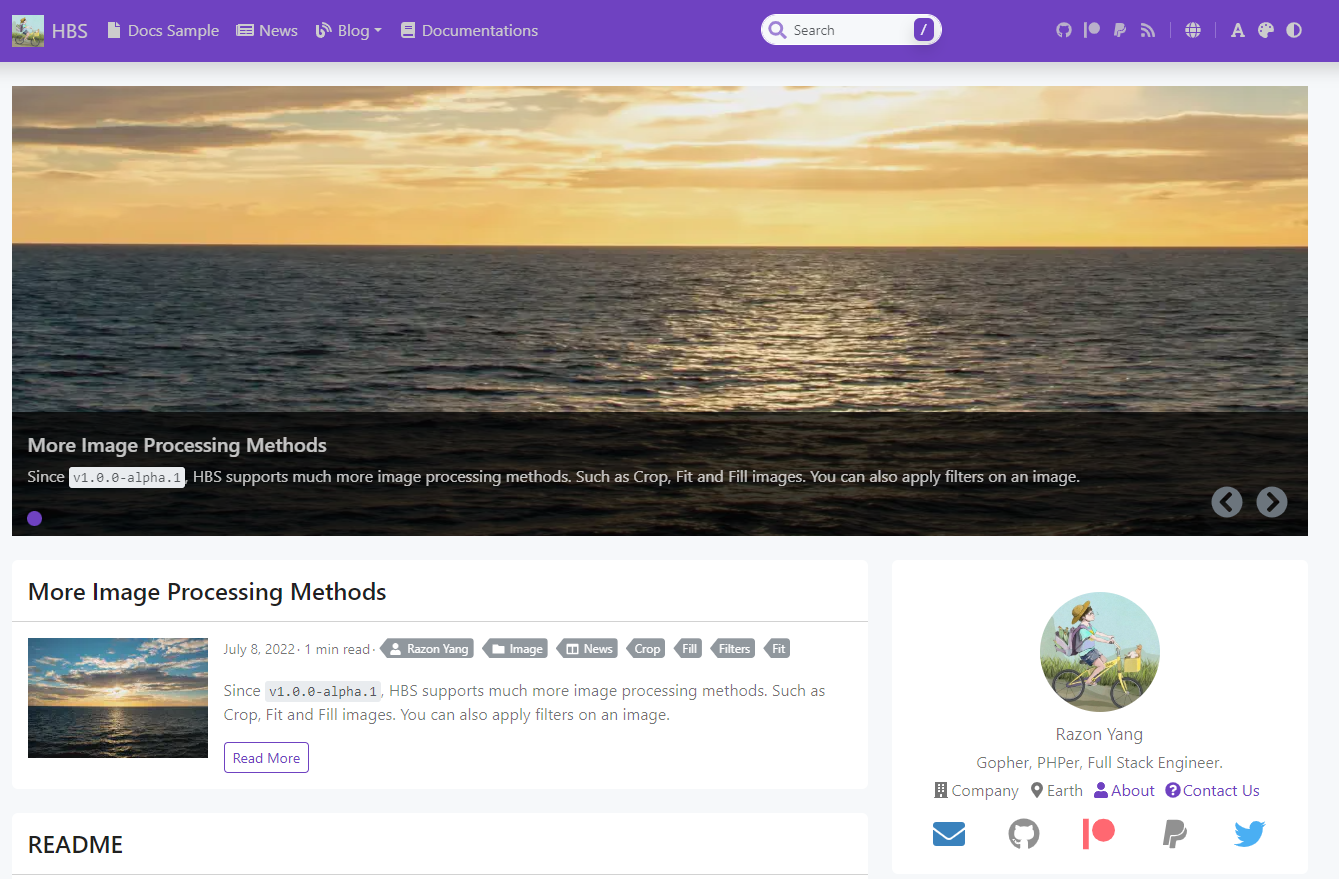
Below shows the site generated by the template. As it has way more sections and menus, I reduced those by updating configurations.
Update Configuration
The config/_default folder contains default configurations and I mainly updated the site configuration (config.yaml), site parameters (params.yaml) and menu configuration (menu.yaml). Note they can be overridden by those in the config/production folder.
 1$ tree config
 2config
 3├── _default
 4│   ├── author.yaml
 5│   ├── config.yaml
 6│   ├── languages.yaml
 7│   ├── menu.yaml
 8│   ├── params.yaml
 9│   ├── server.yaml
10│   └── social.yaml
11└── production
12    ├── config.yaml
13    └── params.yaml
Site Configuration
The site configuration section includes Hugo-defined variables. I mainly updated title, copyright and taxonomies. Also, the markup config is added to override the default config of code highlight and table of contents.
 1# config/_default/config.yaml
 2baseURL: /
 3title: Jaehyeon
 4theme: github.com/razonyang/hugo-theme-bootstrap
 5copyright: 'Copyright © 2023-{year} Jaehyeon Kim. All Rights Reserved.'
 6defaultContentLanguage: en
 7...
 8taxonomies:
 9  category: categories
10  series: series
11  tag: tags
12...
13markup:
14  highlight:
15    lineNos: true
16    lineNumbersInTable: false
17    noClasses: false
18  tableOfContents:
19    endLevel: 6
20    ordered: false
21    startLevel: 2
Site Parameters
The site parameters section includes specific config variables for the Hugo theme. They are self-explanatory and have comments that explain further. Configuration of site parameters would require trials and errors, and we can quickly check the updated content thanks to Hugo’s hot reloading feature.
 1# config/_default/params.yaml
 2mainSections:
 3  - blog
 4  - posts
 5description: <description>
 6keywords: <keyword-1>, <keyword-2>
 7images:
 8  - site-feature-image.png
 9...
10logo: false # Disable Logo
11brand: Jaehyeon Kim
12palette: blue-gray
13color: light # light, dark or auto. Default to auto.
14...
15googleAdsense: <AdSense Publisher ID>
16math: true # Enable math globally.
17toc: true # Disable TOC globally.
18tocPosition: content # sidebar or content
19...
20searchBar: true # disable search-bar
21poweredBy: false # Whether to show powered by.
22readingTime: true # Whether to display the reading time.
23postDate: true # Whether to display the post date in the post meta section.
24...
25sidebarTaxonomies: [categories, tags, series] # The order of taxonomies on the sidebar.
26...
27codeBlock:
28  maxLines: 20
29  lineNos: true # true/false represents that show/hide the line numbers by default.
30...
31post:
32  excerpt: description
33  excerptMaxLength: 200
34  copyright: false # Whether to display copyright section on each post.
35  featuredImage: true # Show the featured image above the content.
36  numberifyHeadings: false # Count headings automatically.
37  numberifyHeadingsSeparator: . # The separator between of number and headings.
38  imageTitleAsCaption: true
39...
40search:
41  paginate: 5 # Pagination. Default to 10.
42  fuse:
43    threshold: 0.1
44...
45topAppBar:
46  social:
47    github: <GitHub User ID>
48    linkedin: <LinkedIn ID>
49    paypal: <Paypal.Me Link ID>
Menu Configuration
For now, I only need the blog menu and all other items are removed from the menu configuration.
1# config/_default/menu.yaml
2main:
3  - name: Blog
4    identifier: blog
5    params:
6      icon: '<i class="fas fa-fw fa-blog text-warning"></i>'
7      description:
Production Configuration
As mentioned, the production configuration can be overridden. I’ll host it using a custom domain, and the base URL is updated accordingly. I added the Google Analytics measurement ID as well, and it’ll ensure the site activities are tracked only when it is deployed.
1# config/production/config.yaml
2baseURL: https://jaehyeon.me/
3googleAnalytics: <Measurement ID>
Content Configuration
Contents of a post are kept in a subfolder of the content/blog folder - e.g. content/blog/2023-04-27-self-hosted-blog. The article is written in index.md, and the post folder includes figures that can be referenced within the article. Note featured.png will be showing at the top of the post page as well as in the post list - see the featured image configuration for details.
 1$ tree content/blog/2023-04-24-self-hosted-blog/
 2content/blog/2023-04-24-self-hosted-blog/
 3├── after.png
 4├── before.png
 5├── comment-1.png
 6├── comment-2.png
 7├── comment-3.png
 8├── comment-4.png
 9├── custom-domain-1.png
10├── custom-domain-2.png
11├── custom-domain-3.png
12├── discussion-1.png
13├── discussion-2.png
14├── featured.png
15├── giscus-1.png
16├── giscus-2.png
17└── index.md
The page parameters can be added at the top. It allows you to configure post components (e.g. comment, toc, carousel, …), visibility (e.g. draft) etc.
 1---
 2title: Self-managed Blog with Hugo and GitHub Pages
 3date: 2023-04-24
 4draft: true
 5featured: false
 6comment: true
 7toc: true
 8reward: false
 9pinned: false
10carousel: false
11featuredImage: false
12# series:
13#   -
14categories:
15  - Blog
16tags:
17  - Hugo
18  - Bootstrap
19  - GitHub Pages
20authors:
21  - JaehyeonKim
22images: []
23description: <description>
24---
25
26<article contents>
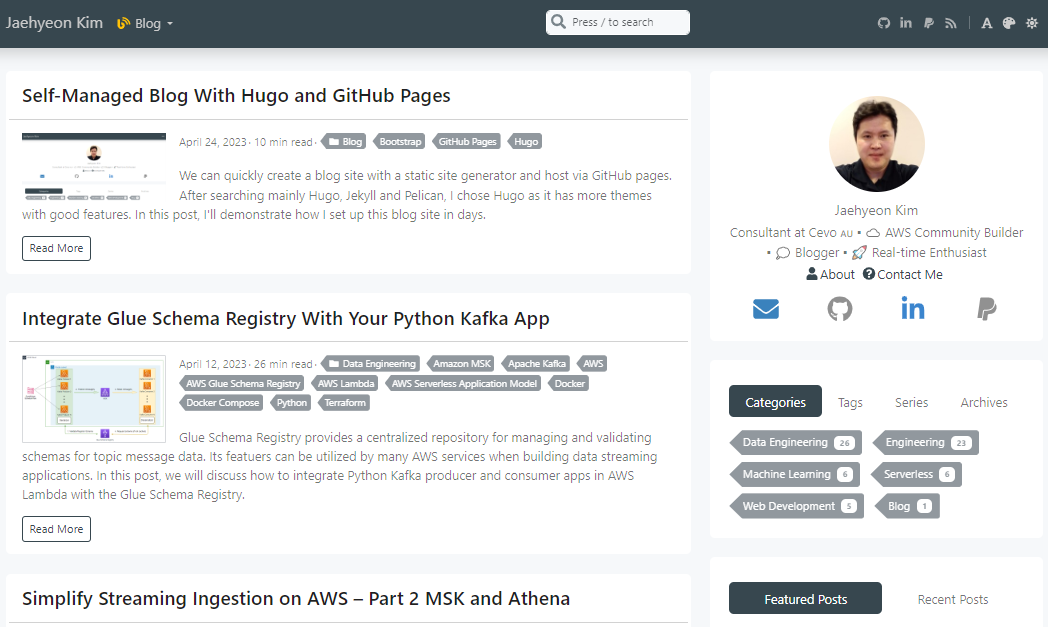
Once created, we can check it appears in the post list as shown below. We can visit the post by clicking the title or the Read More button.
Configure Custom Domain
The GitHub Pages has a good documentation about custom domain configuration. I’ll sketch how I set it up so that my custom domain (jaehyeon.me) is used to serve the site.
Create ACM Certificate
I bought the domain from Route53, and a public hosted zone is created automatically. In order to serve the site via HTTPS, an ACM certificate is create for the domain and all of its subdomains. We can create a certificate by CloudFormation, and domain validation can be automated via DNS validation.
 1AWSTemplateFormatVersion: '2010-09-09'
 2Description: Create an ACM certificate for a domain and all of its subdomains.
 3Parameters:
 4  DomainName:
 5    Description: Fully qualified domain name (eg example.com)
 6    Type: String
 7  HostedZoneId:
 8    Description: Route53 hosted zone id
 9    Type: String
10Resources:
11  ACMCertificate:
12    Type: AWS::CertificateManager::Certificate
13    Properties:
14      DomainName: Ref: DomainName
15      DomainValidationOptions:
16        - DomainName: Ref: DomainName
17          HostedZoneId: Ref: HostedZoneId
18      SubjectAlternativeNames:
19        - !Sub "*.${DomainName}"
20      ValidationMethod: DNS
21Outputs:
22  ACMCertificateArn:
23    Value:
24      Ref: ACMCertificate
Manage Custom Domain
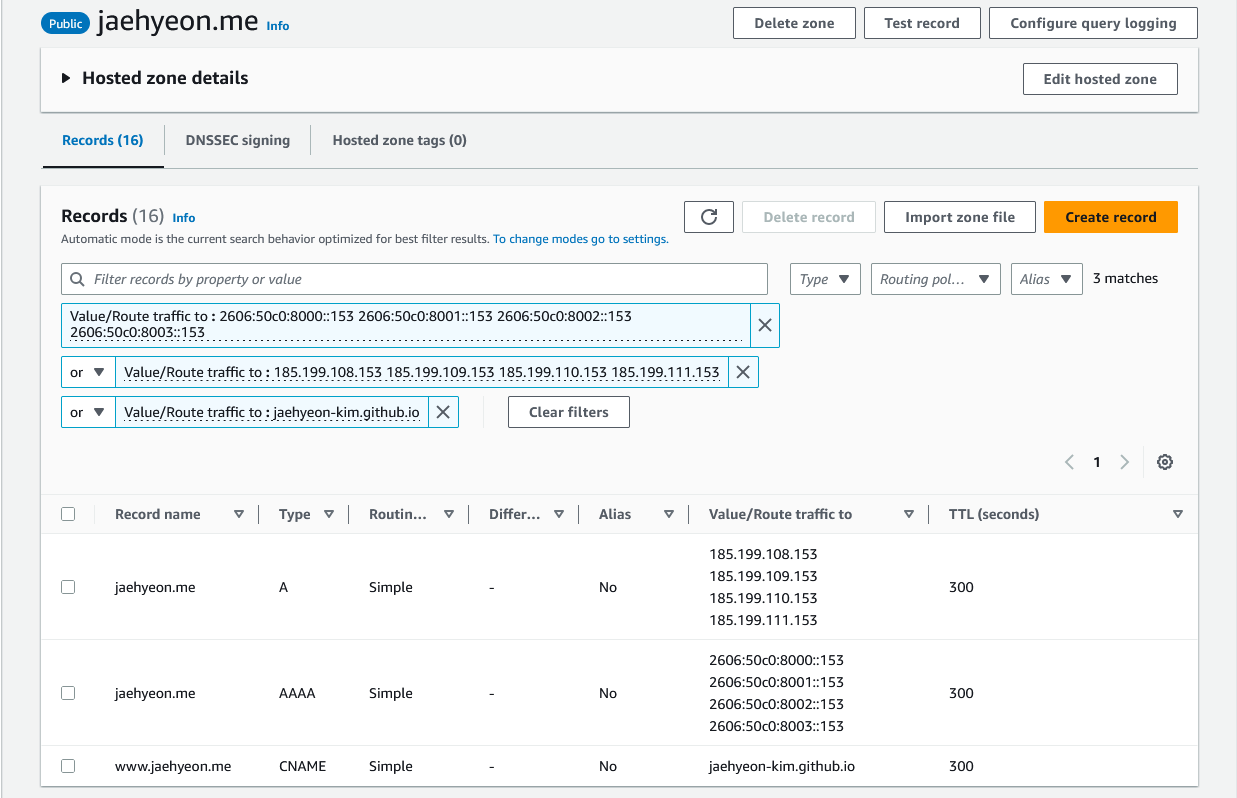
I plan to configure the apex domain (jaehyeon.me) primarily and added the A and AAAA records to the hosted zone as indicated in the documentation. Also, the WWW subdomain (www.jaehyeon.me) is configured by adding a CNAME record to it. In this way, if someone visits the site by www.jaehyeon.me, it’ll be redirected to jaehyeon.me.
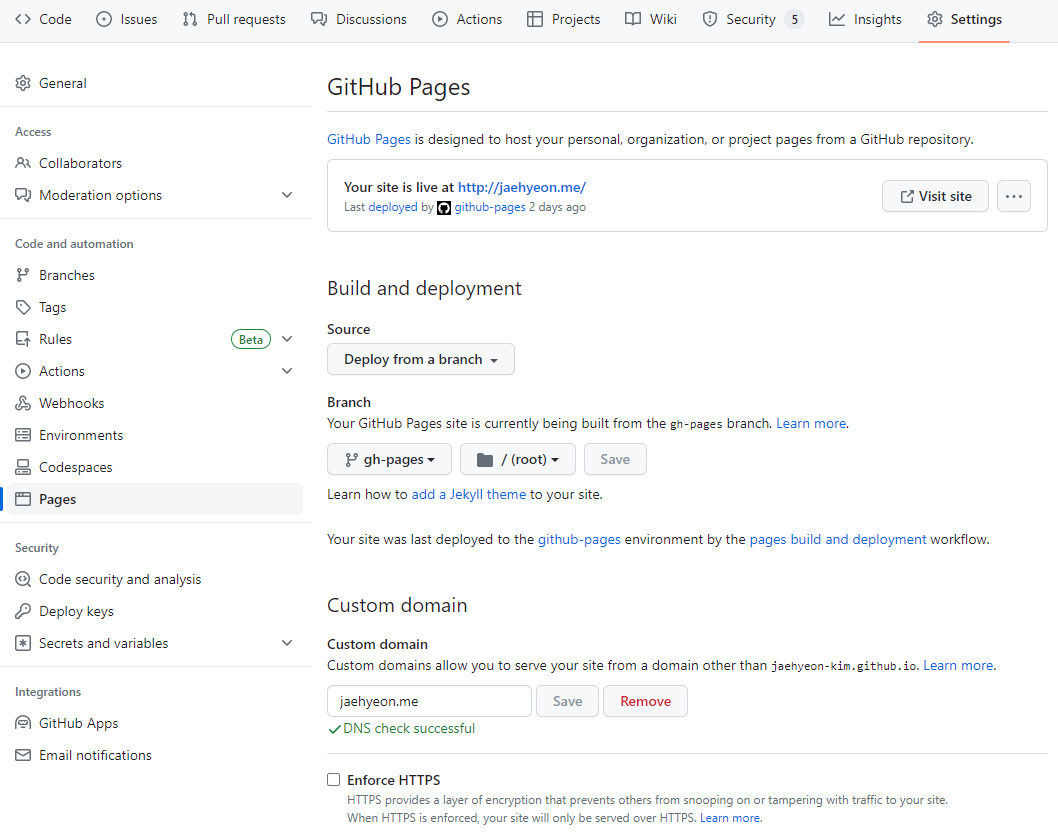
I saved the custom domain in the repository setting, and it is checked successfully. Note I do not enforce HTTPS as Google AdSense fails to verify the ads.txt file when it was enforced.
Verify Custom Domain
The GitHub Pages recommends verifying the custom domain in order to increase security by avoiding takeover attacks. The domain is verified as shown below.

Deployment
The starter template has a GitHub workflow (.github/workflows/gh-pages.yml). It builds the site and deploys the ./public folder to the remote gh-pages branch. Note GitHub Pages should be linked to the gh-pages branch.
I added three additional files to the ./public folder so that they are found in the deployed site. CNAME includes the custom domain name (jaehyeon.me) so that it keeps being linked to the site. ads.txt is required by Google AdSense, and site-feature-image.png is as per the site parameter configuration.
1$ tree public
2public
3├── CNAME
4├── ads.txt
5└── site-feature-image.png
Once it is deployed, we can visit the site using the custom domain.
(Optional) Comment Widget
While it supports multiple comment widgets, I decided to use Giscus, which is a lightweight comment widget built on GitHub discussions.
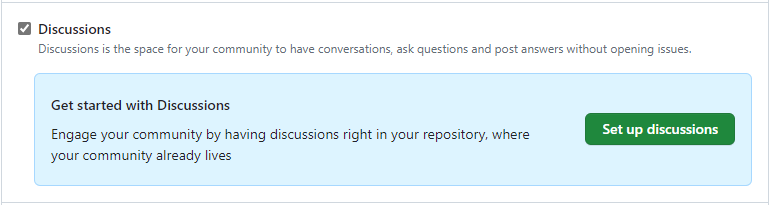
I first enabled Discussions in the repository Settings as shown below.
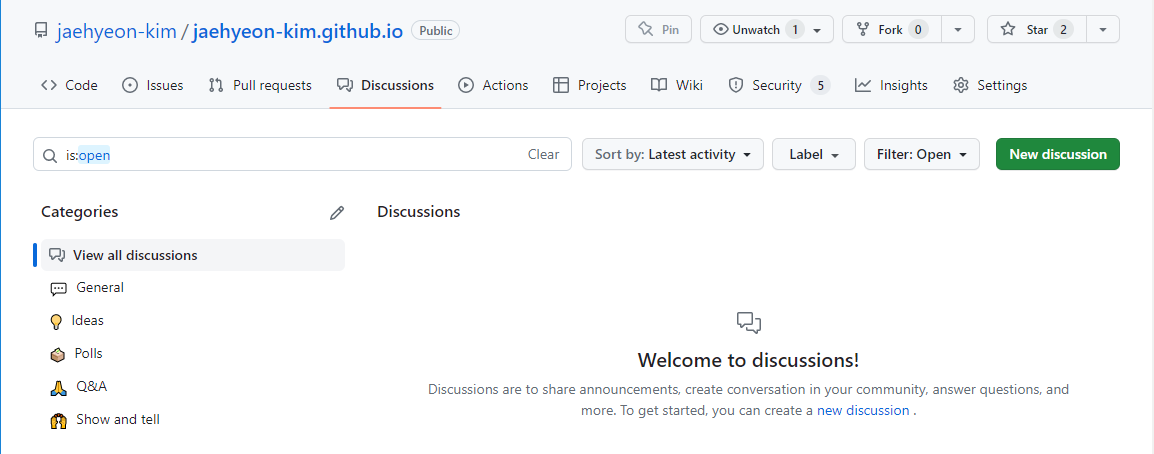
After that the Discussions tab is showing at the top, and we can see multiple discussion categories in that menu. As shown below, the widget requires a category where comments are saved, and I chose the General category.
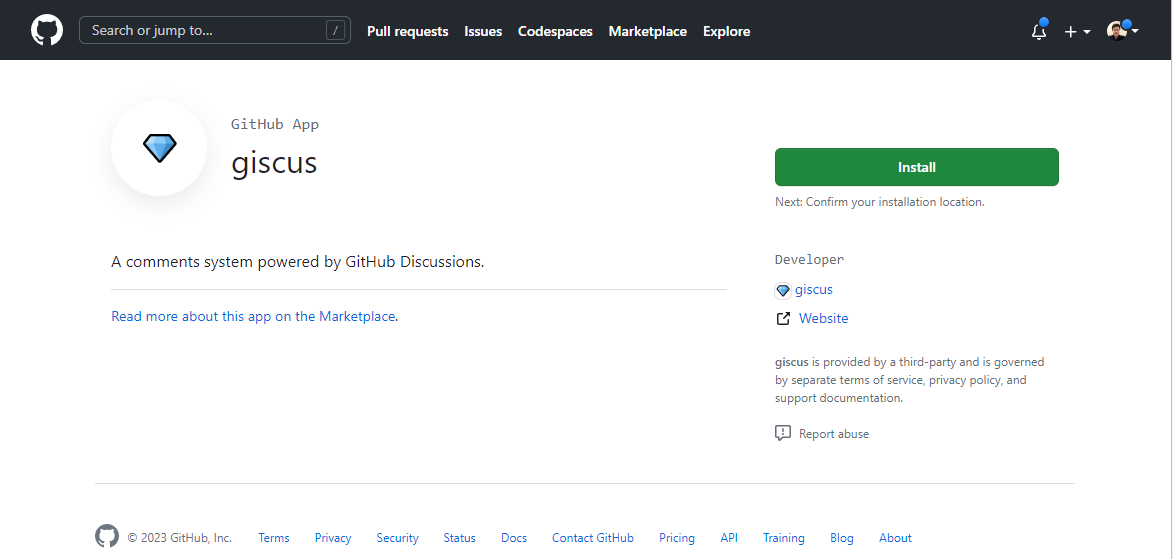
Then we need to install the widget as a GitHub app, and it can be installed by visiting its GitHub App page.
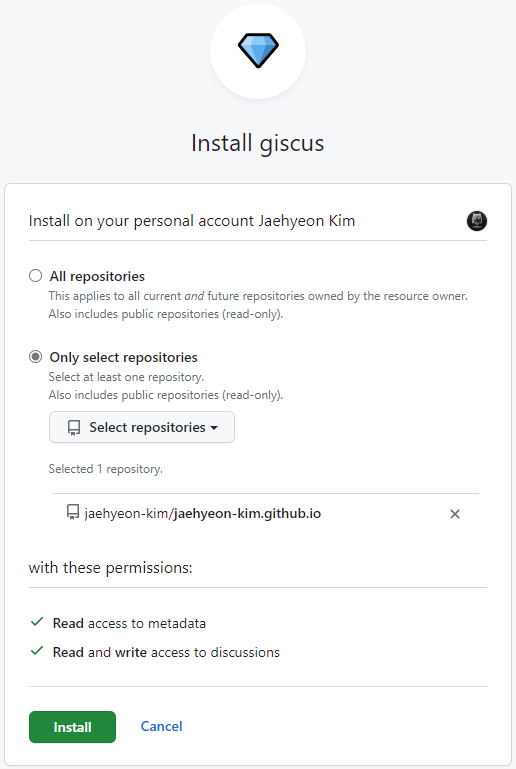
I only selected the repository for the blog site and clicked the Install button.
The Giscus configuration can be found in the site parameter configuration. It requires the repository name/ID and category ID.
 1# config/_default/params.yaml
 2...
 3giscus:
 4  repo: <repo-owner>/<repository-name>
 5  repoId: "<repository-id>"
 6  # category: ""
 7  categoryId: "<catetory-id>"
 8  # theme: "dark" # Default to auto.
 9  # mapping: "title" # Default to pathname.
10  inputPosition: "bottom" # Default to top.
11  reactions: true # Disable reactions.
12  metadata: true # Emit discussion metadata.
13  # lang: "en" # Specify language, default to site language.
14  # lazyLoading: false # Default to true.
15...
The repository and category IDs can be obtained from the GitHub GraphQL API Explorer. In the query, it is limited to show only the first one category, and you may increase the number if the category you want to use is not queried.
 1query {
 2  repository(owner: "<repo-owner>", name: "<repository-name>") {
 3    id # RepositoryID
 4    name
 5    discussionCategories(first: 1) {
 6      nodes {
 7        id # CategoryID
 8        name
 9      }
10    }
11  }
12}
 1{
 2  "data": {
 3    "repository": {
 4      "id": "<repository-id>",
 5      "name": "<repository-name>",
 6      "discussionCategories": {
 7        "nodes": [
 8          {
 9            "id": "<catetory-id>",
10            "name": "General"
11          }
12        ]
13      }
14    }
15  }
16}
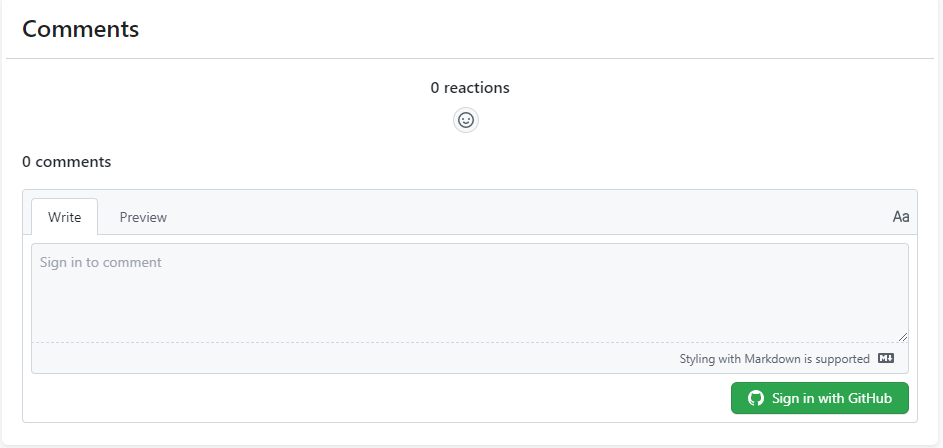
Once the configuration is updated, we can see the Comments section appears correctly. We first need to sign in with GitHub to leave a comment.
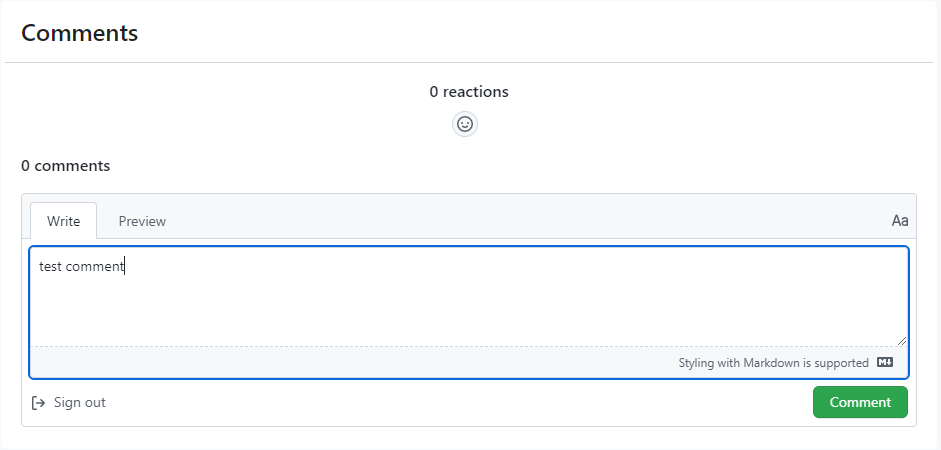
Once signed in, the text area is enabled, and we can leave a comment.
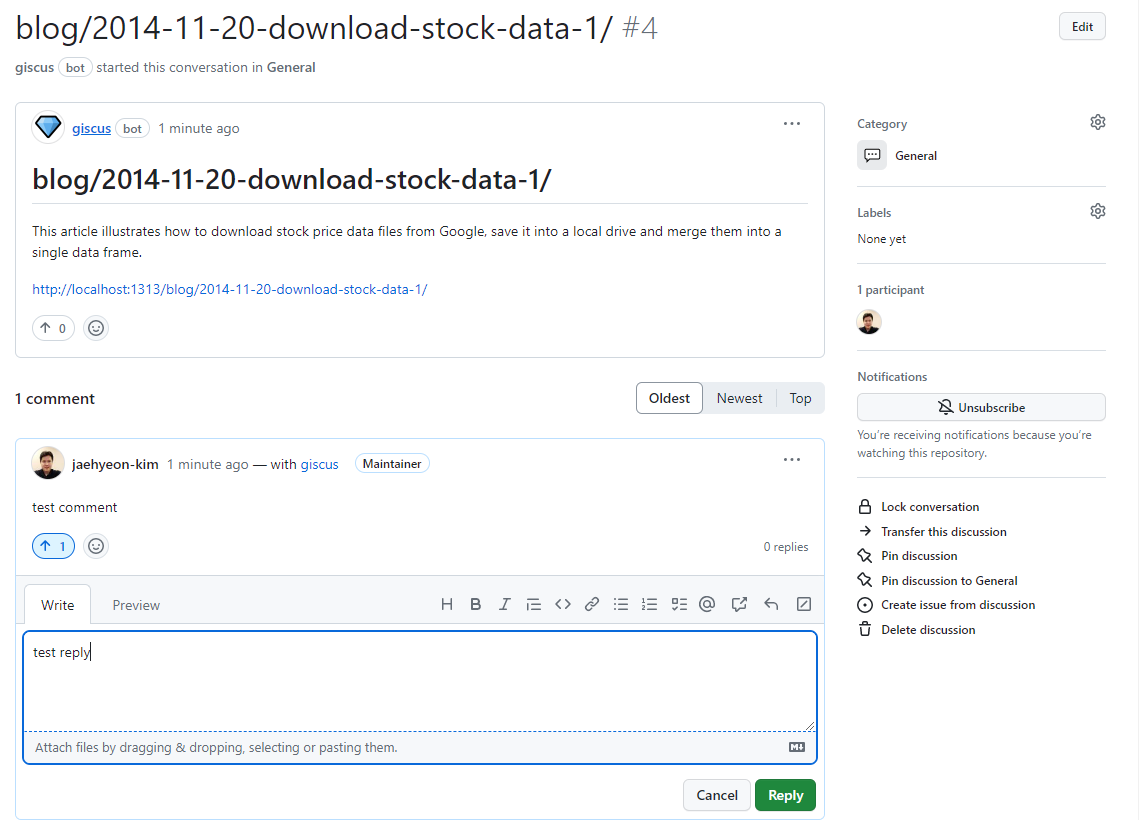
The comment can also be checked on the Discussion > General of the repository and a reply can be made from it.
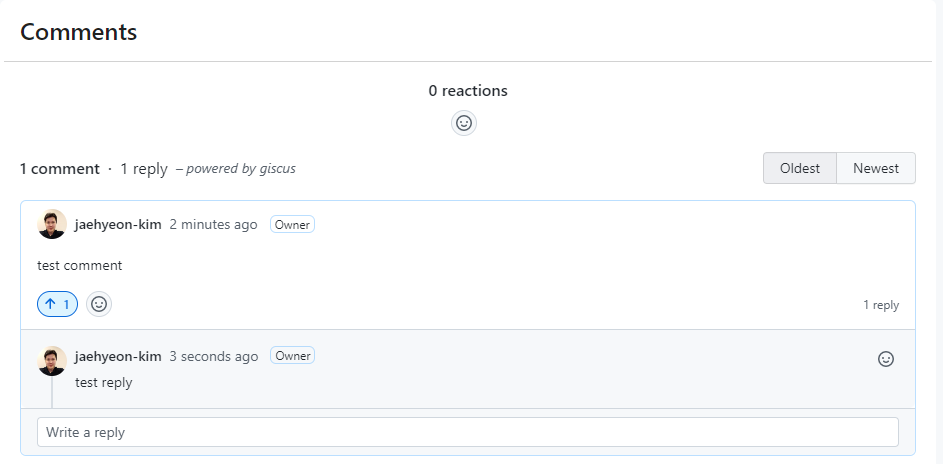
On the post page, we can see the reply
Updates
2023-05-28
The Hugo version is updated to 0.112.3, and the following changes are made.
- A new docker images is used as the existing one doesn’t support the updated Hugo version. As a result, the docker compose file is updated as following.
 1version: "3.5"
 2
 3services:
 4  hugo:
 5      image: peaceiris/hugo:v0.112.3-full
 6      command: server -D -F -E --poll 700ms --bind=0.0.0.0
 7      container_name: hugo
 8      volumes:
 9        - $PWD:/src
10        - /etc/ssl/certs:/etc/ssl/certs
11      ports:
12        - "1313:1313"
- The template module is updated to
v1.0.2. As I don’t have go installed, it is updated inside the new docker image.
1$ docker run --rm -it -v $PWD:/src --entrypoint bash peaceiris/hugo:v0.112.3-full
2## inside docker
3root@<container-id>:/src# hugo mod get github.com/razonyang/hugo-theme-bootstrap@v1.0.2
4root@<container-id>:/src# hugo mod npm pack
5root@<container-id>:/src# npm update
6## the changes will be committed on the host outside docker
7root@<container-id>:/src# exit
8$ git add go.mod go.sum package.json package-lock.json
9$ git commit -m 'update them to v1.0.2'


Comments